Written by our engineers, TechVentiX is a blog series in which we’ll dive deeper into the technology of application distribution and management.
With the new AppVentiX 5 release, managing App Control for Business just got a whole lot easier. Once activated, you can create and manage policies, collect triggered application events from your clients, and build new policies based on those events, all from a single interface.
In this blog post, we’ll walk you through securing your environment and keeping your users safer.
Before you Start

Make sure both Central View and the Agent are updated to version 5.0.26 or later.
What is App Control for Business?
App Control for Business, formerly known as Windows Defender Application Control (WDAC), is a Windows security feature that controls which applications are allowed to run on your devices. Unlike traditional antivirus that tries to detect malicious software, App Control flips the approach: only explicitly trusted applications can execute.

Think of it as the sheriff of your endpoints. If an application isn’t on the wanted list, it doesn’t get to ride into town.
The challenge has always been management. Creating and maintaining WDAC policies manually is complex and time-consuming. You’re dealing with XML files, policy merging, and deployment headaches. That’s where AppVentiX 5 comes in. It takes the heavy lifting out of your hands and gives you a centralized interface to collect real-world application data from your endpoints, review what’s being blocked or would be blocked, create and refine policies based on actual usage, and deploy policies across your environment.
The result? You get the security benefits of application whitelisting without drowning in XML.
Enabling App Control in AppVentiX
Start AppVentiX Central Management and make sure you have permission to edit and change Machine Groups. To enable App Control, you have two options: directly from the App Control management pane, or through the Machine Group settings.
Option 1: From the App Control Pane
The quickest way is to enable it directly in the App Control pane. Click on the App Control tab in Central View. On the left side you’ll see your policies (once created), and on the right side you’ll see the Machine Groups configured in AppVentiX.
Right-click on a Machine Group, in this example LAB Test (Feature disabled), and select Enable AppControl Feature.

Option 2: From Machine Group Settings
Go to the Machines & Inventory tab and click on the Machine Group button in the toolbar. Select your environment (preferably a test environment) and click on Configure Agent for selected Machine Group. Under General settings, check the checkbox to Enable App Control management.
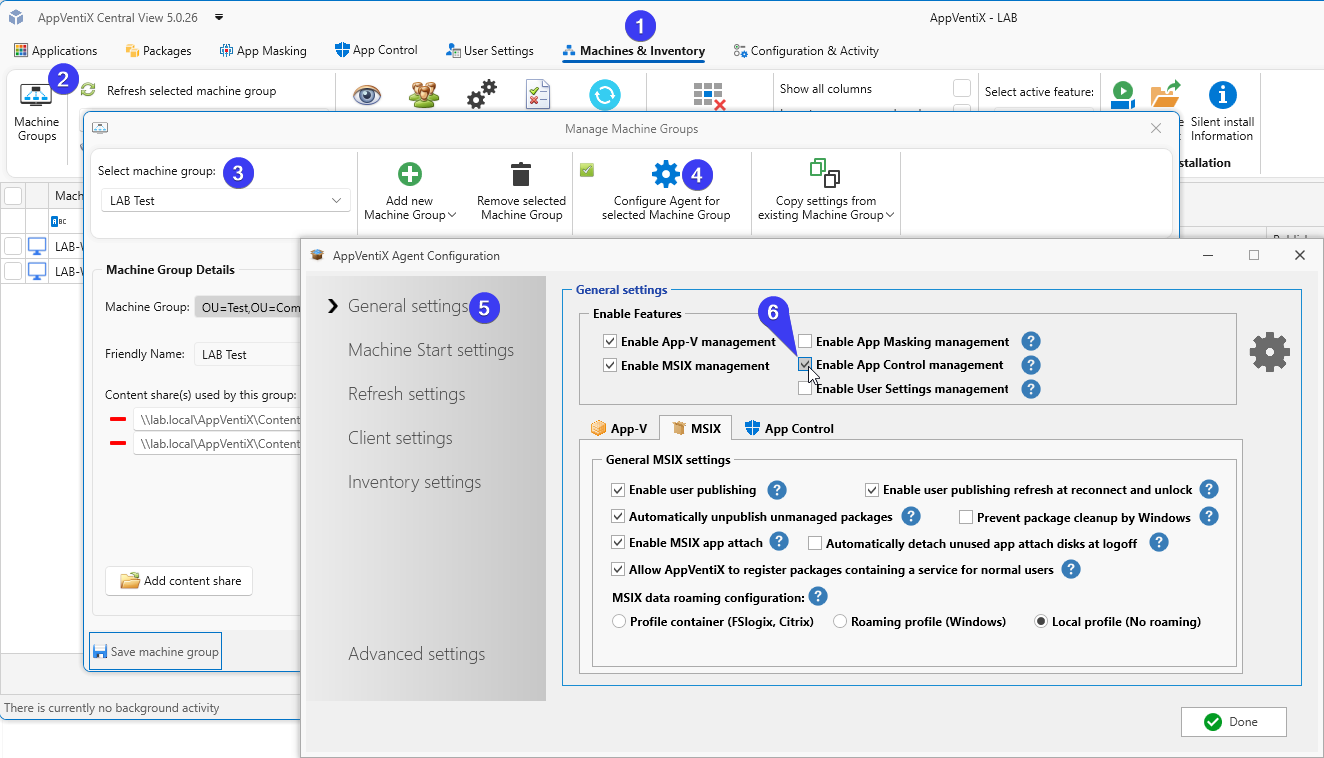
Repeat this step for each Machine Group you want to enable.
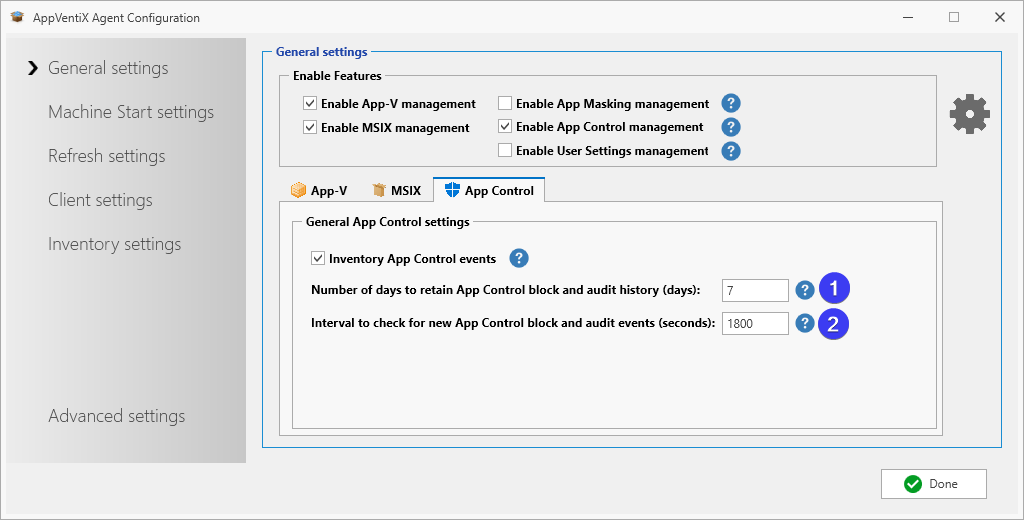
In the Machine Group General settings you also have the option to fine-tune the history and event collection settings.
By default, 7 days of history will be retained. Old data will be purged.
The interval to check for new App Control events is set to 30 minutes (1800 seconds) by default. Only new events triggered since the last retrieval will be added to the log.
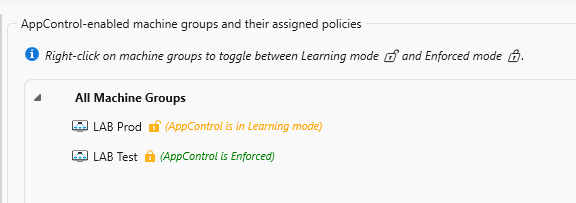
When a Machine Group is initially enabled for App Control, it starts in Learning Mode. Nothing will be blocked and everything is allowed to run. Events will be written to the event log.
When eventually you have configured all your policies you can enable a Machine Group to Enforced mode. When this is active all applications not allowed to run will be blocked.
You can easily switch between Learning Mode and Enforced mode by right-clicking on the Machine Group.
Now you are ready to gather events from the clients.
Understanding the Default Behaviour
With the App Control feature enabled, nothing is blocked by default. The agent simply starts collecting events from the Windows event log and reports them back to Central View for review.
A word of caution: don’t start with your entire (production) environment. Each client will report back triggered events, and you can quickly drown in data. Start small, create your initial policies, and test thoroughly before rolling this out to production.
Generating Events
Log into a machine as a user and start several applications. Click around, open files, do your normal work. Or simply enable the feature and let it run in the background while you go about your daily tasks.
Speeding Up the Sync
Events are synced automatically in the background, but if you want to investigate a specific event in Central View right away, you can trigger a manual sync. On the client, open the Start Menu and scroll down to Refresh Workspace.

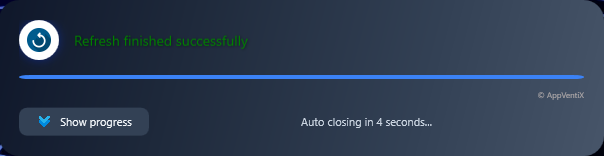
A small popup will appear showing the sync progress. Click Show progress if you want more details.
Note: This happens automatically if you do nothing. The manual method just speeds things up.
Reviewing Events in Central View
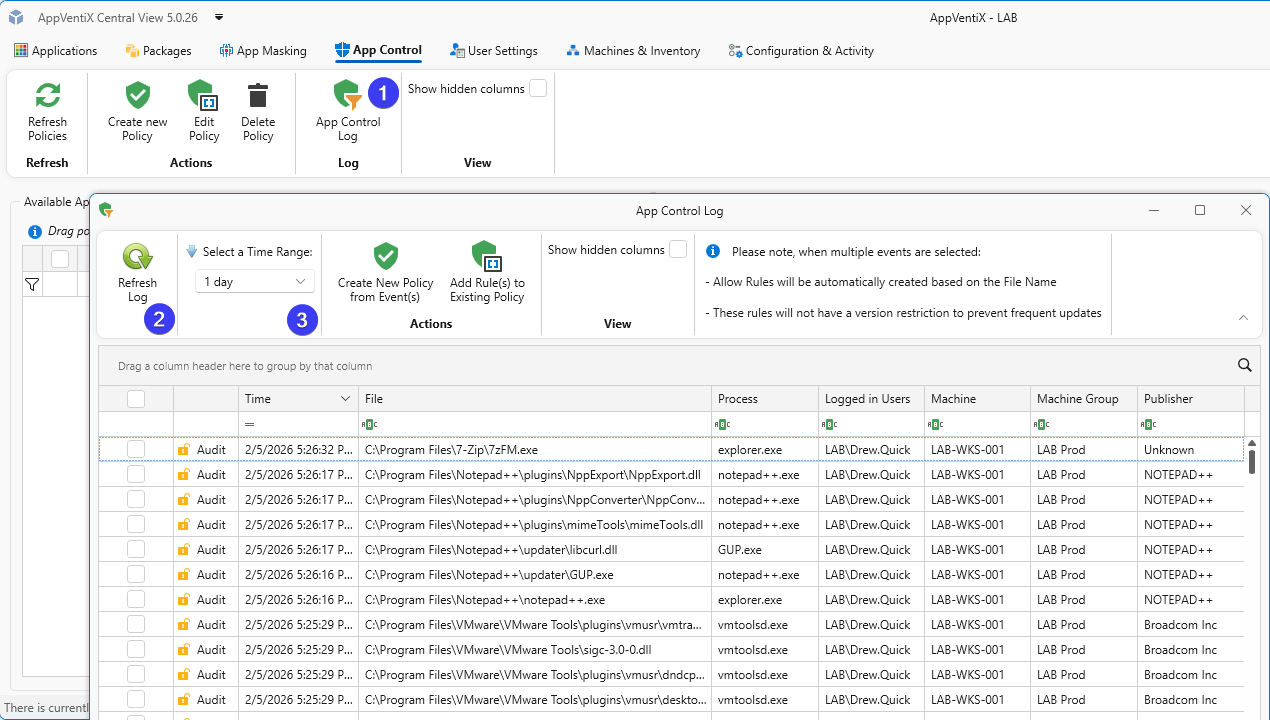
After some time has passed, open the App Control Log in Central View to see the events triggered by your users. Click Refresh Log to load the latest data, or use Select a Time Range to filter by a specific period.
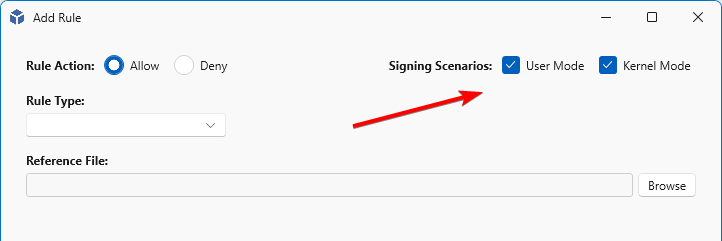
User Mode vs Kernel Mode: Choosing the Right Scope for Your Policy
Windows runs software on two separate levels that cannot easily interfere with each other. User Mode is the “safe playground” where your everyday applications run: browsers, Office, business-specific software, and essentially everything you deploy via an installer or package. These programs have limited privileges and cannot directly access hardware or critical system components. If a User Mode application crashes, Windows keeps running just fine.
Kernel Mode is the domain of drivers and system components that have direct access to hardware and the Windows core. Think of printer drivers, network drivers, antivirus kernel components, or storage controllers. Software at this level runs with the highest privileges. This is great for performance, but also risky. A faulty or malicious driver can bring down your entire system. That’s exactly why strict control through policies is valuable here.
When you create a policy in AppVentiX, these checkboxes determine where the rule applies. Standard applications (.exe, .msi, .msix) fall under User Mode; drivers (.sys) and kernel components fall under Kernel Mode. In most cases, you can leave both checked and Windows will automatically apply the rule at the appropriate level. But if you want to deliberately limit the scope, for example to whitelist applications only while managing drivers through a separate policy or other tooling, you can uncheck one of the two. This keeps your policies clean and prevents unintended side effects.
Understanding Rule Types
When creating a policy, you need to decide how to identify the application you want to allow or block. AppVentiX offers four rule types, each with its own trade-offs between security and flexibility.
Publisher rules trust applications based on their digital signature. This is the most flexible option: as long as the software is signed by the same publisher, updates will automatically be allowed without policy changes. Ideal for commercial software that’s regularly updated. Can be combined with product name, filename, and version combinations to make the policy more restrictive.
File or Path rules allow anything running from a specific file or entire directories, such as C:\Program Files\YourApp\. You may use wildcards in the path. This is convenient but less secure. If an attacker manages to drop a malicious file in that folder, it will be trusted too. Use this sparingly and only for well-protected directories.
File Attributes rules match on metadata like the original filename, product name, or internal name embedded in the executable. Useful when publisher signing isn’t available but the file has consistent attributes across versions.
Note: Only works in User Mode (not for kernel drivers)
File Hash rules trust a specific file based on its cryptographic hash (SHA1/SHA256). This is the most restrictive option: if the file changes even slightly (like after an update), the hash won’t match and the application will be blocked. Best suited for files that rarely change or when you need absolute certainty about what’s running.
In practice, you’ll often combine these. Use Publisher rules for your mainstream software, and fall back to File Attributes or Hash for unsigned or in-house applications.
Creating Your First Policy
Policies can be created using two methods, manually and via AppControl (learned) Logs.
Creating policies manually
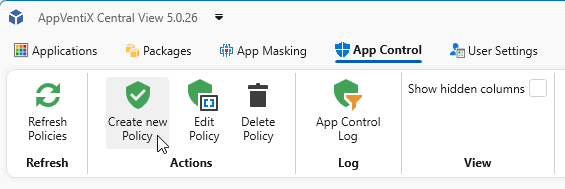
Open the App Control tab and click on Create new policy.
Here you can choose a rule type, the first four we already discussed: Publisher, File or Path, File Attributes, and File Hash. There are two more options available:
- Certificate here you can select a reference file, a certificate (.cer, .crt, .p7b file) and create a (Publisher) rule, based on this certificate file.
- Folder Scan within this selection you can create policies automatically. It will try to create a Publisher rule first. If that cannot be achieved, it will fall back to File Attributes, then Path, and finally File Hash. With this option you can for example scan Network shares for applications and files you want to allow.
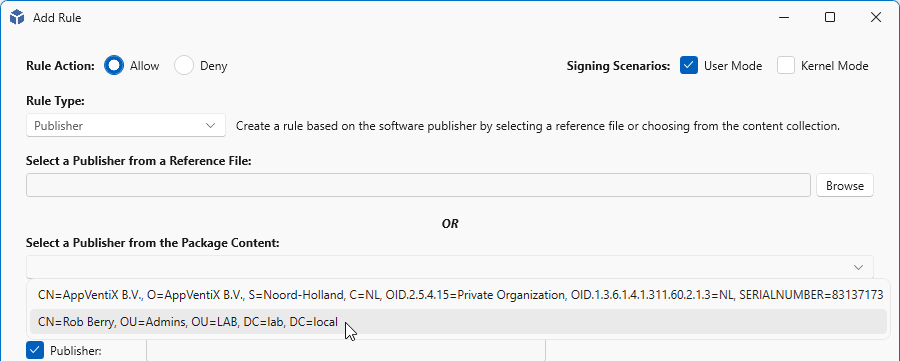
For a packaged app (E.g. MSIX applications) it’s easier to add them manually with the Publisher method. When you have clicked Create new Policy, Select Publisher from the list with Rule Type, next you can select a reference file (.exe, .dll or .sys). For a Packaged app select the next option, Select a Publisher from the Package Content. This list will show all extracted unique Publishers extracted from signed packages on the content shares.
When you have selected a publisher from the list, the rule will be filled in with the data from the signed package. When finished, click Create Rule.
A name will be generated based on the rule you have created, if you want you may change this accordingly.
Note: Some rule creation take a long time, please wait until they are created.
Creating policy from Logs (Learning mode)
The other option is as explained earlier the option to create rules from the logs (learned rules). To add rules make sure you are on the App Control tab and click on the App Control Log button in the toolbar.
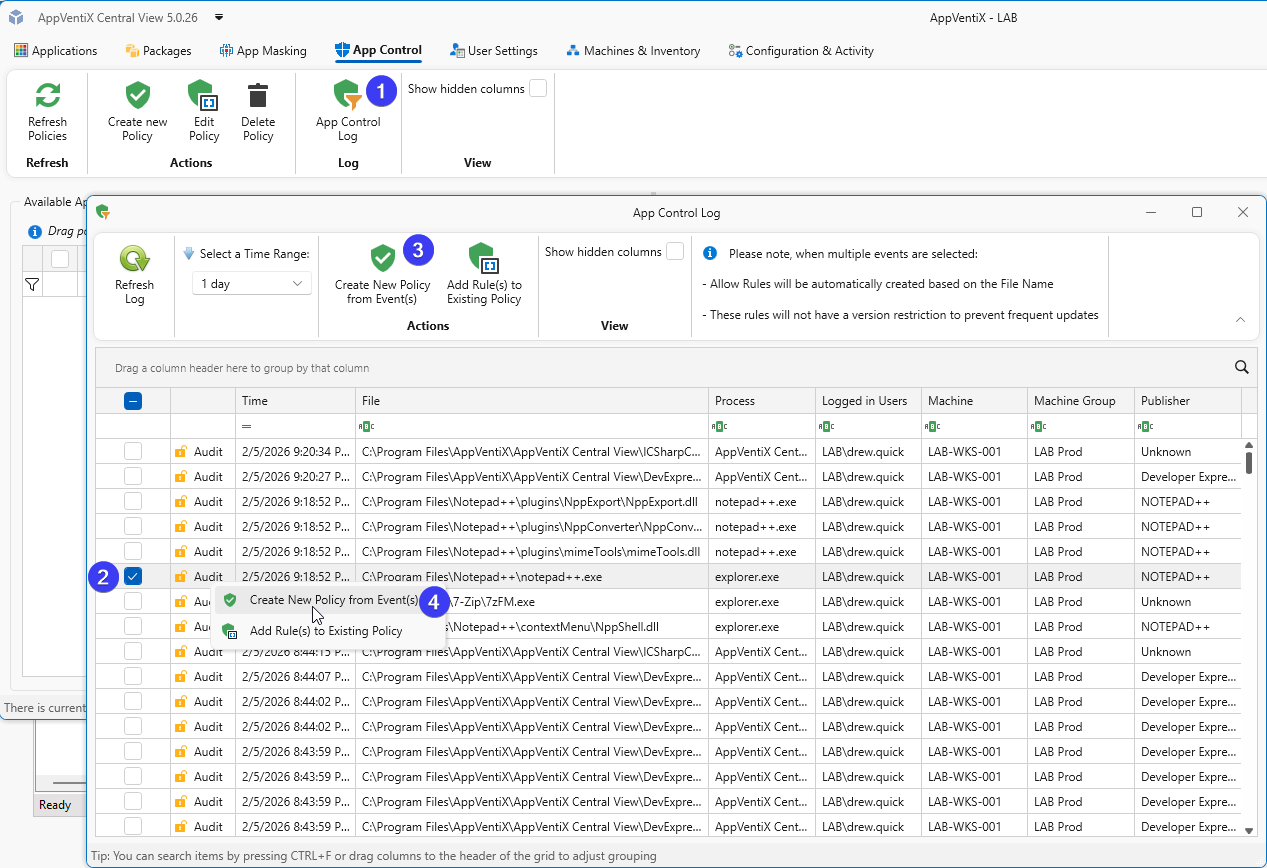
Next select an entry you want to add, in this case I want to add “Notepad++”. As you can see in the image (most right column) “Notepad++” has a publisher named “NOTEPAD++” so in this case we can create a publisher rule based on this one line. You can click in the toolbar on the Create New Policy from event(s) button or right-click on the selected rule and click Create New Policy from event(s).
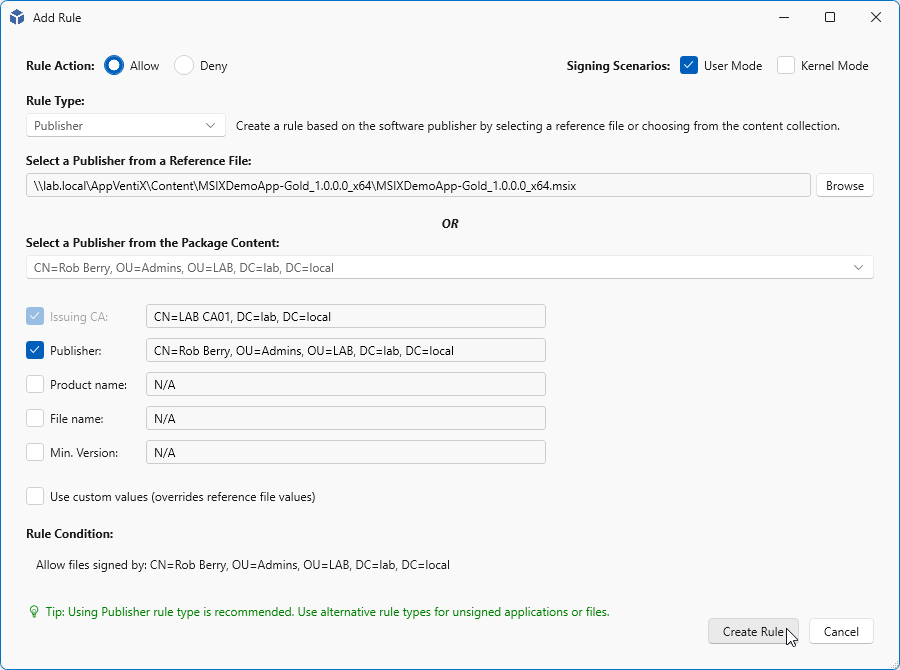
In the next section you can further configure the rule. By default only the Issuing CA and Publisher are checked. And this is good enough for this rule. In some cases you want to further configure a rule. Say you have two applications. Both are signed with the same certificate, but you only want to allow one. In that case you can check Product name, same with File name and Min. Version. But in most cases only Publisher (and sometimes Product name) will be enough. When finished click Create Rule

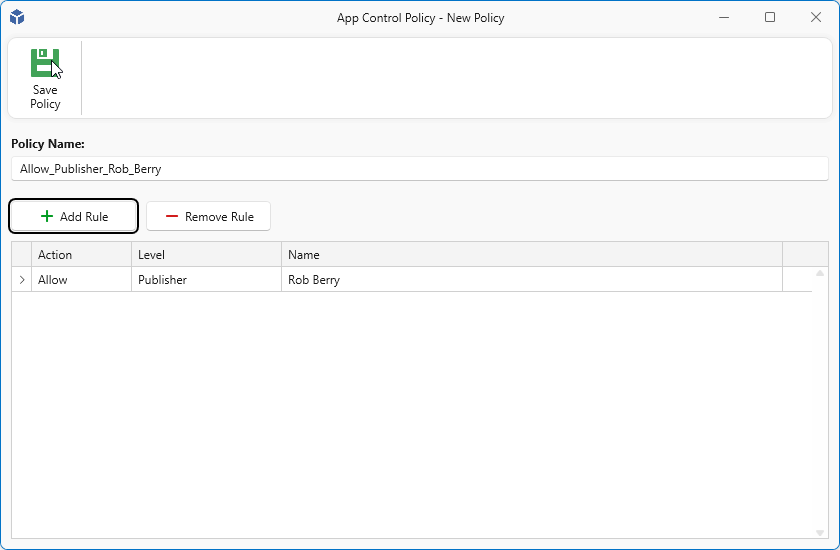
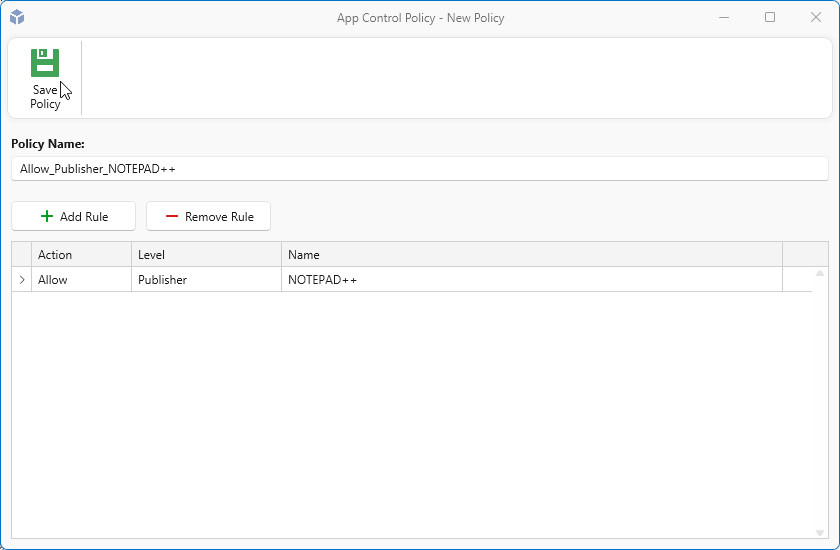
Next a default name will be generated based on the Rule Type you have selected and the publisher name. If you want you can change it. When you are ready click Save Policy
Creating File Path Policy from Logs
Sometimes a Publisher rule is not possible because a file is not signed. Without a digital signature, there’s no publisher information to base a rule on. One example is 7-Zip, which ships unsigned executables.
Like we did earlier, select an item in the Log, and click Create New Policy from Event(s).
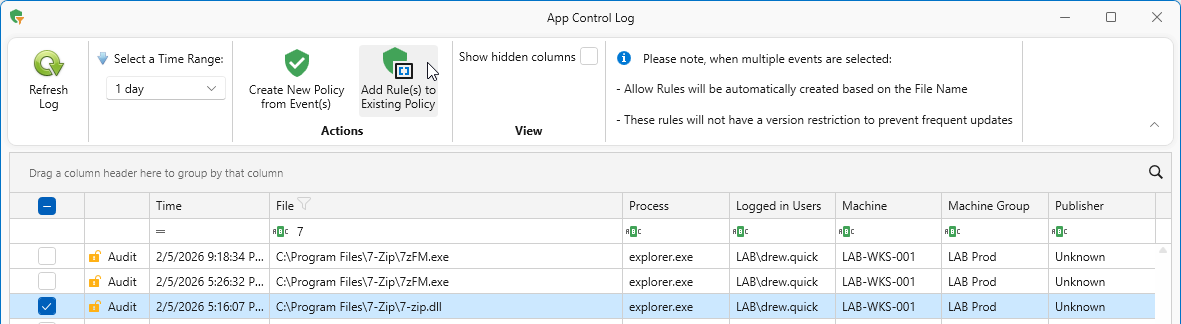
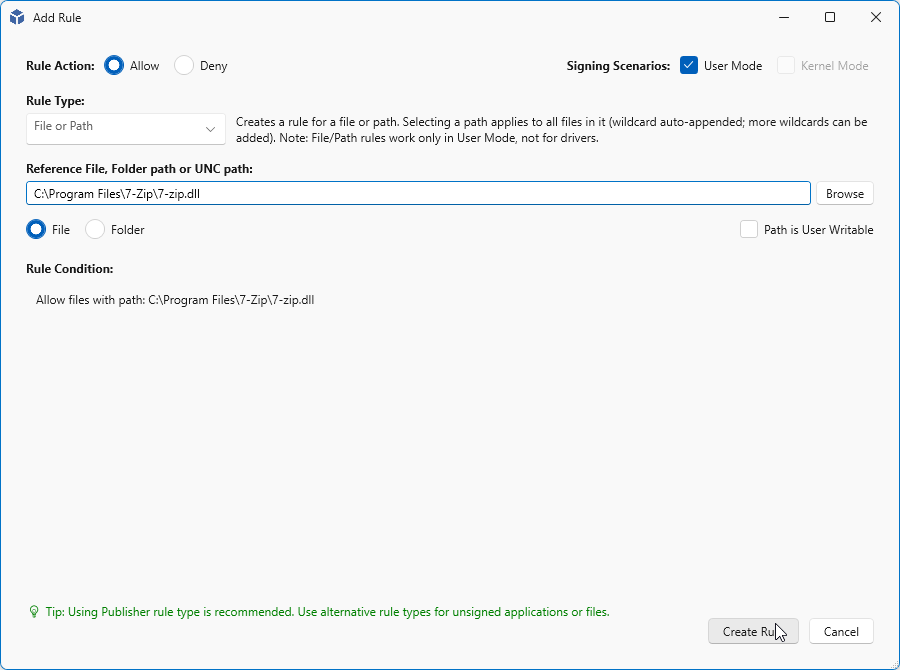
On the next page, verify that everything is correct and click Create Rule.
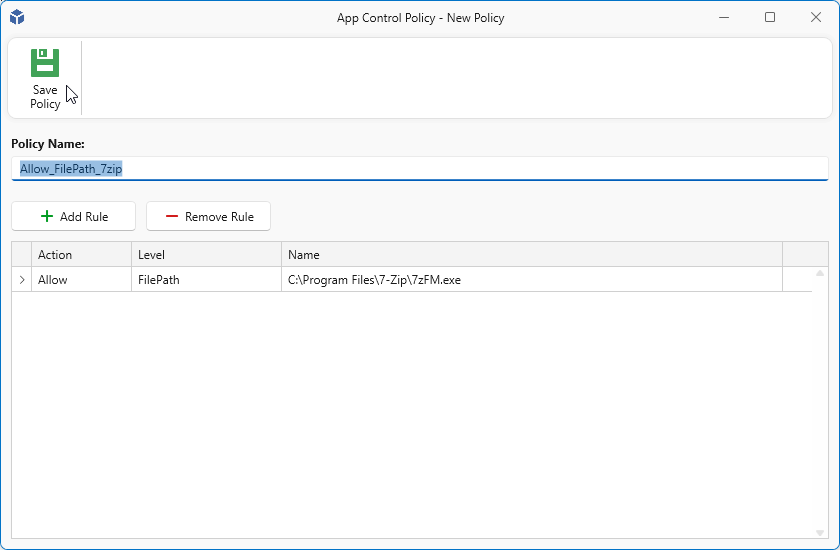
Like before a default name is generated, but with file rules like with 7zip this may not be the only file. There may be other files for the same application. You can create a rule for each application but you can also choose to combine these in one rule. If you decide to combine rules later on, make sure you provide a helpful name. In this case we will rename this rule (set) to Allow_FilePath_7zip so we can add other 7-Zip rules to the same policy.
To add new rules to an existing policy, select the items you want to add and click Add Rule(s) to Existing Policy.
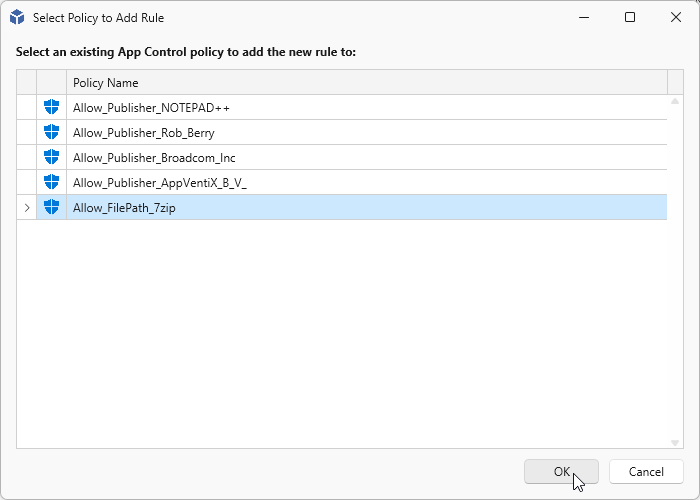
Next select the policy you want to add the rules to and click OK to continue to the next step.
Verify the rule to add and click on Create Rule.
And finally when you are finished adding rules, click Save Policy.

Assign and Activate
Now it’s time to assign and activate the created policies. With this action you will determine where the policies will be applied. For example to All Machine Groups or one or more machine groups. This can be achieved simply by selecting the policies you want to assign and drag them into the group you want them to be active or drag them onto All Machine Groups to activate them on all Machine groups.
The policies are immediately available for the clients to pick them up and will be applied when the agent checks for new updates.
Note: Please note that applications or processes that are allowed are no longer logged in the App Control log
Take It for a Ride
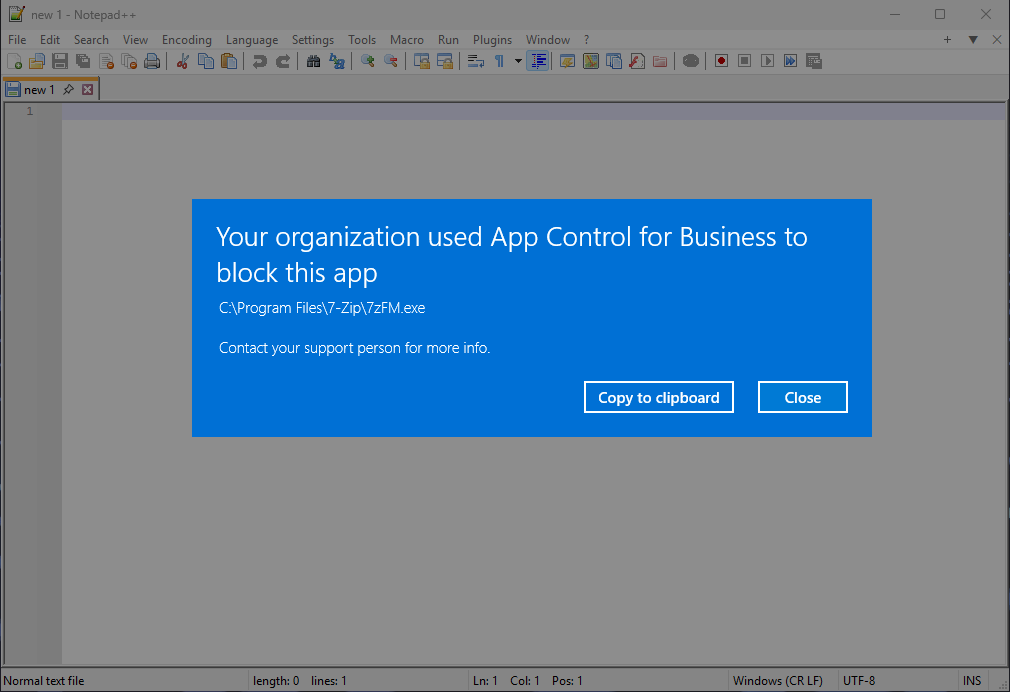
When you have scoured the logs for the last fugitives, you can take the next step and disable Learning Mode and enable Enforced mode. If all goes well, your applications start without giving a blocked message. You can just as easily switch back to Learning Mode if you have issues or want to troubleshoot something.
And as you can see in the next image we were able to start Notepad++ as we have allowed it and activated the policy for it. And 7-Zip was blocked since we did not (yet) activate this policy.
Policy Management & Best Practices
Here are some things to keep in mind when working with App Control policies:
- Creating policies that allow files or paths on UNC locations is supported only on Windows 11 and Windows Server 2025.
- Publisher policies may not apply to service executables (processes launched by background services). In these cases, use folder path-based allow policies instead.
- Policies that allow files in user-writable locations (for example, the user profile) require the Path is writable checkbox. This option is automatically enabled for profile paths. For other locations, verify that users have write permissions and enable this setting if necessary.
- Wildcard usage: folder path rules (C:\Program Files\MyApp\*) apply to all files in the directory.
- With the Folder Scan rule type, you can connect to a remote UNC share to scan a whole folder at once. It will extract publisher information and fall back to file path or hash when files are not signed.
- Creating policies from events is the easiest and most effective way to manage your App Control implementation.
Ride Off Into the Sunset
With App Control for Business and AppVentiX 5, you now have the tools to lock down your environment without the complexity of managing raw WDAC policies. Start in Learning Mode, gather your events, build your policies, and when you’re confident, flip the switch to Enforced.
Remember: start small, test thoroughly, and expand gradually. Your endpoints will be safer for it.
Questions or feedback? Reach out to the AppVentiX team to see how we can help secure your environment. Now get out there and keep your environment safe.